So we moved into a new house over one year ago thanks to our favorite realtor/friend in the Charlotte area Tracee Ellerbe!!
We had a nice size master closet but it looked cheap and was not very functional for us. Long story short after we got a quote from Closets By Design over $6,000 and they told me it might take over 4-5 months to get the closets because of supply chain issues. On top of that, I would need to rip everything off the walls, fix the drywall, and paint it before they could install it.
I said.. NO WAY, I am doing this myself! 🙂
Just to be clear….. I had to persuade my wife to take on this project because I do not have a good history of starting/finishing projects. A project like this affects your daily life as this was our closet we used while I was also building incrementally. 🙂
Here are some BEFORE pictures of our closet.
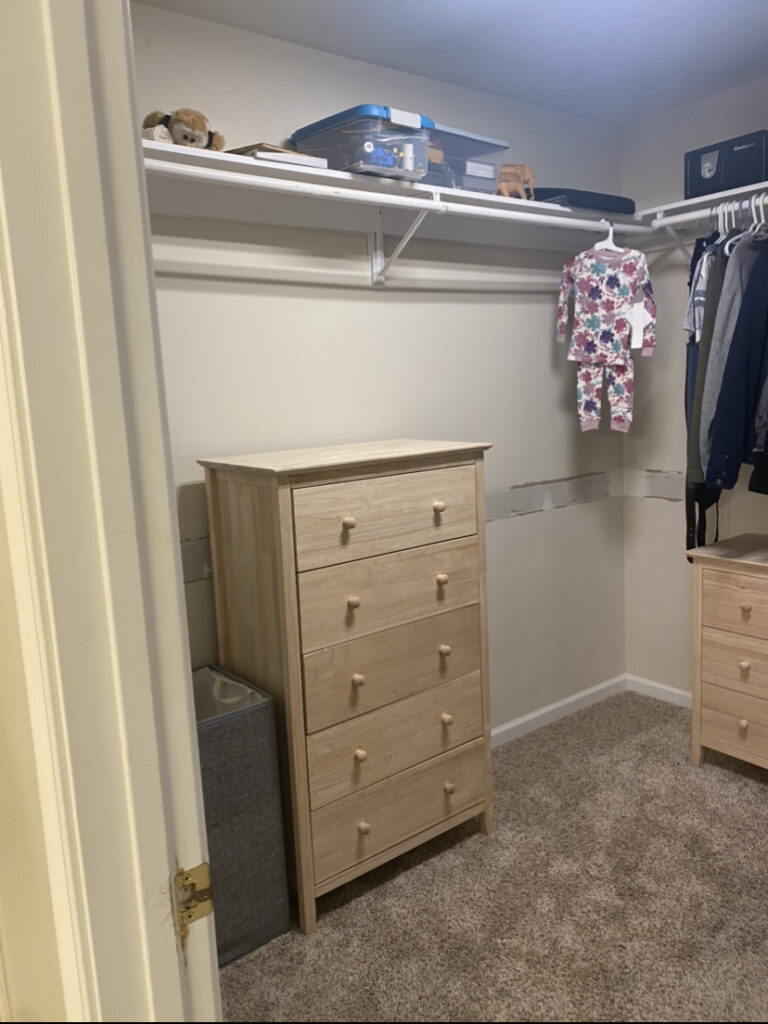
Left Side of the Closet, you can see where I already pulled a shelf with hanger rod off the wall so I could fit the dresser 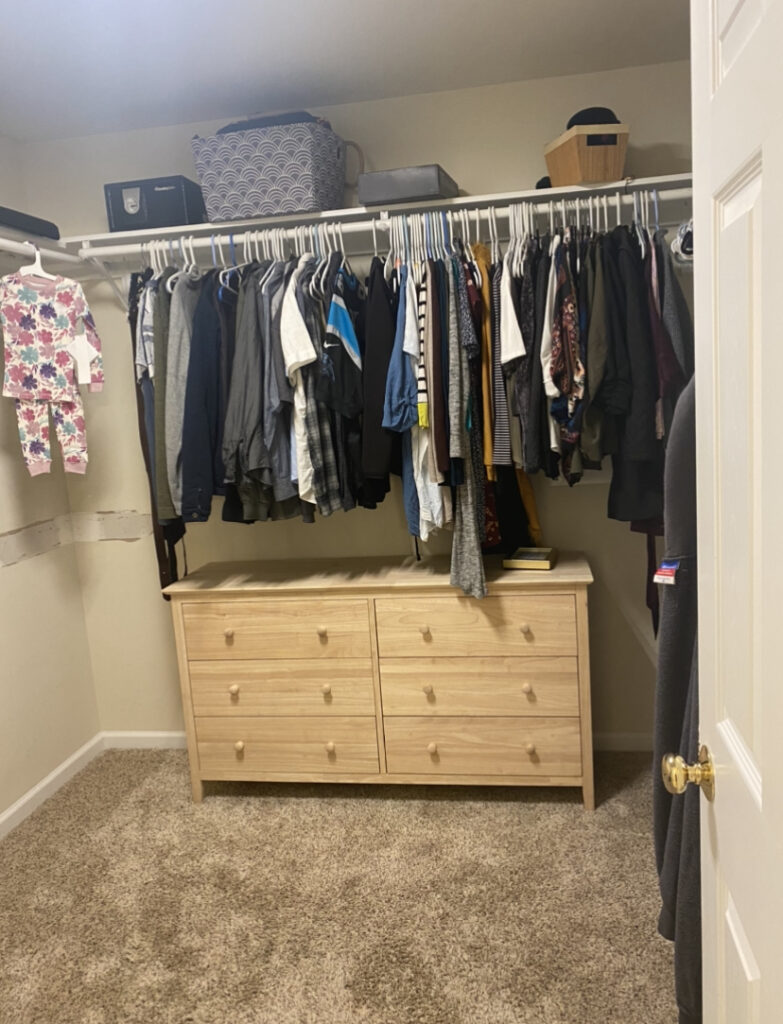
Back Center of the Closet 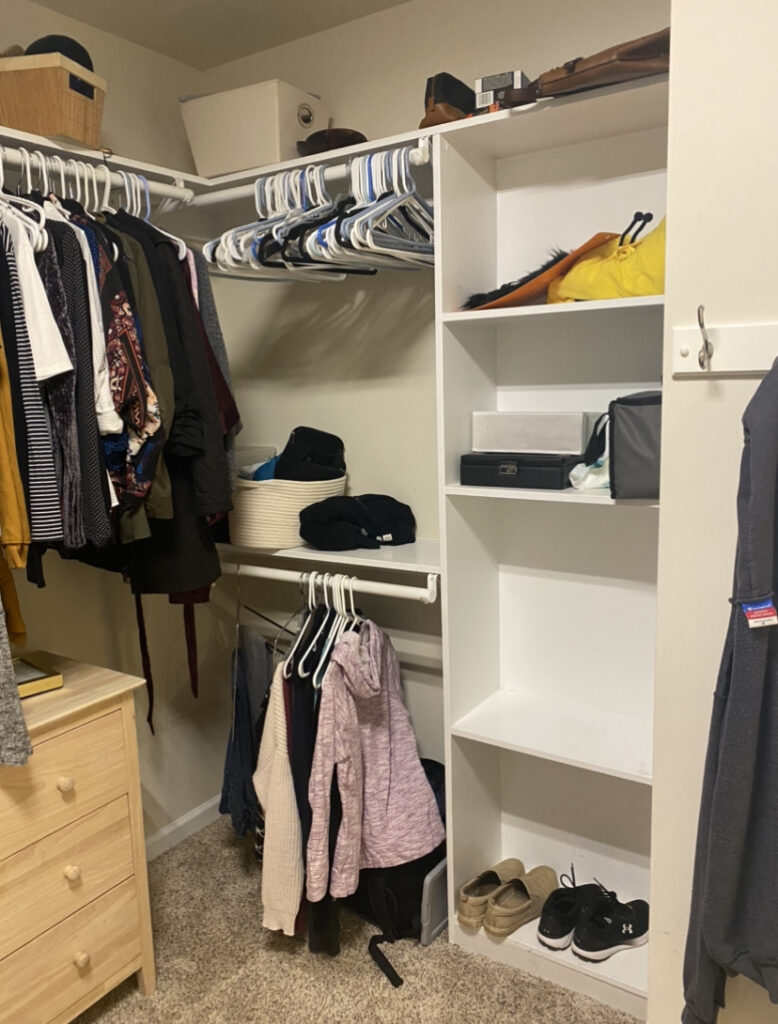
Right side of the closet
FYI, I took inspiration of doing my DIY closet from Cass Makes Home! I used some of your techniques with a twist to make this work for us!
I actually hacked a lot of furniture for this project.
Here are some Pictures Halfway Through the Project
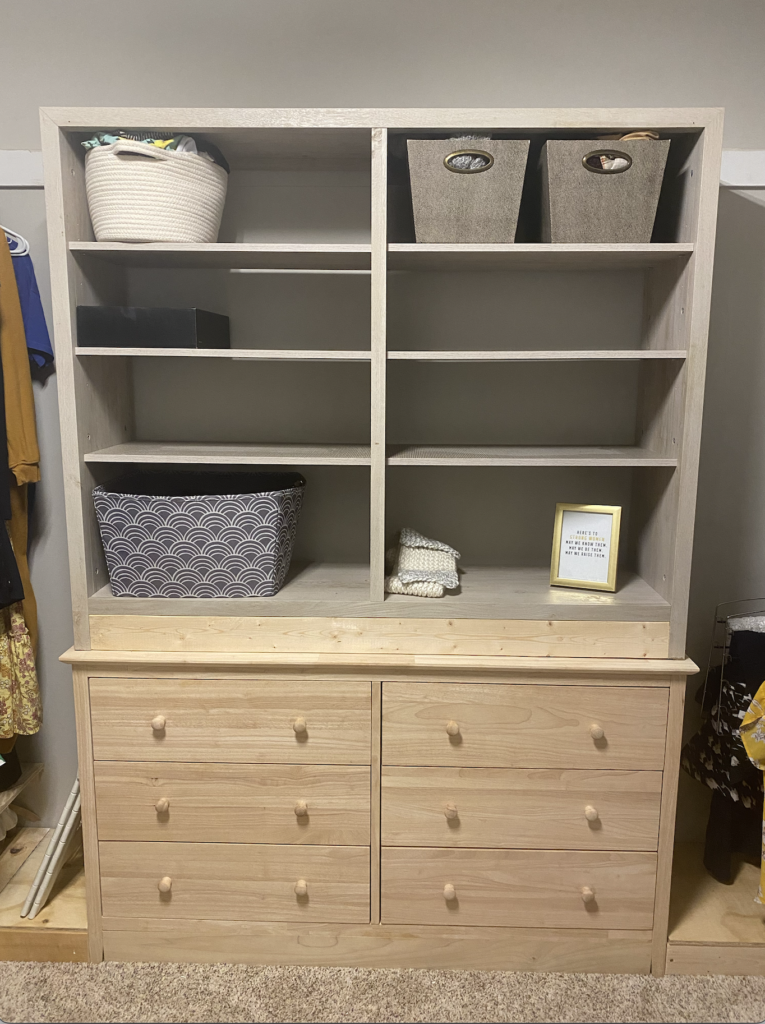
When I say I hacked this project, I really did hack this project! You can see I bought bookcases and just threw them on top of my dressers. The hardest thing for me was to find bookcases that are only slightly smaller than the dresser so they fit properly.
And yes, I did safely secure these to each other and also to the wall. I don’t want this to fall over with any strong winds.
Here are some AFTER pictures of our closet.
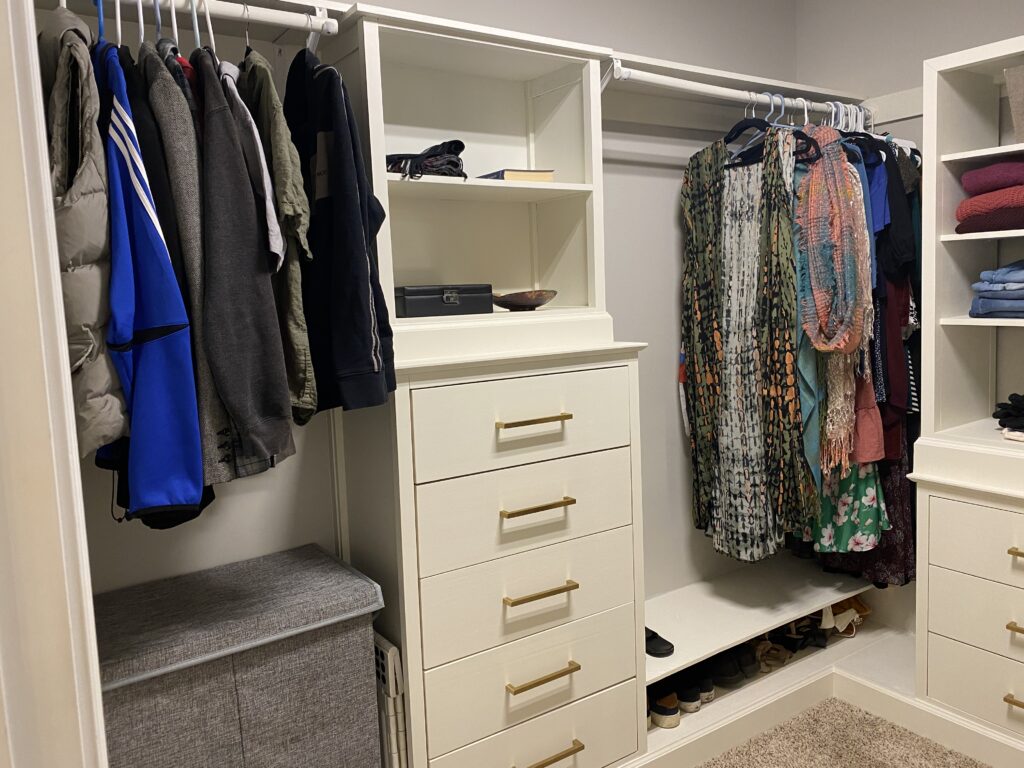
So I kept most of my top rack and added a shoe section. 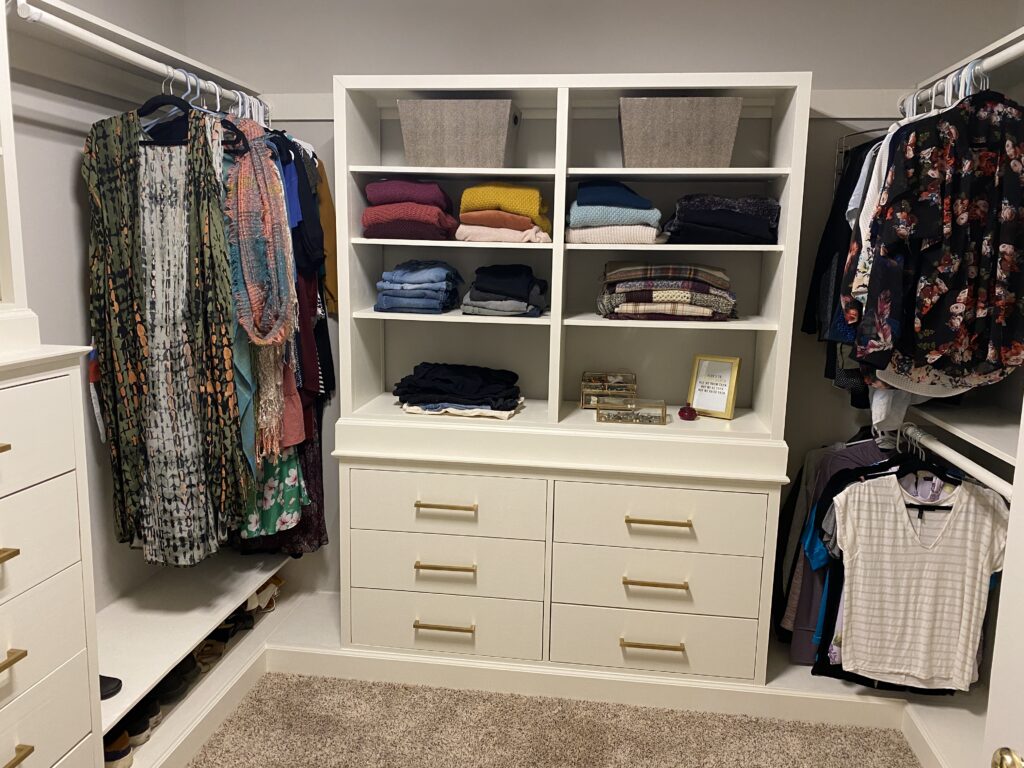
I used a lot of trim to make it look sleek 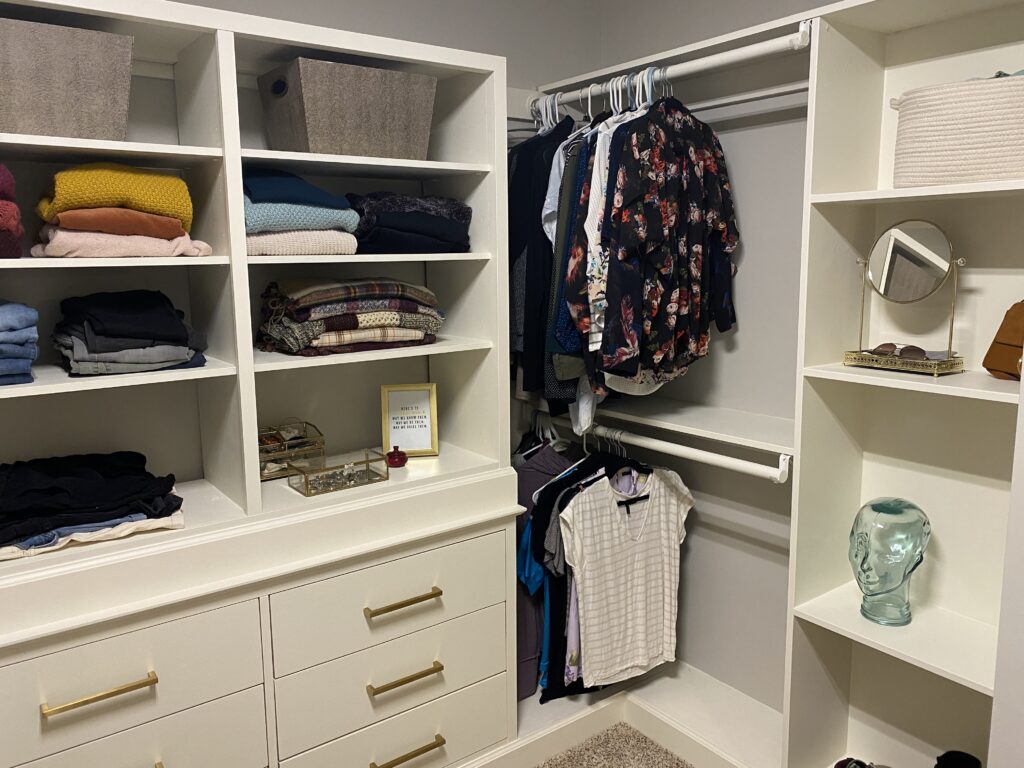
The right side I only painted it. Saved me time and money!
I spent around $1,800-$2,000 on this entire makeover. I can still improve and enhance the closet a bit if I want but for now, I am going to put this project to rest. We are happy with the final product!
I know most people need more shoe storage but we have a mudroom that handles most of our shoes so this closet fits our needs.
Breakdown of What I used to Build this Closet
- 6 Drawer Dresser $600 – Check it Out Here at Home Depot
- 5 Drawer Dresser $450 – I also got this at Home Depot
- 8 Shelf Bookshelf $350 – Got this one at WayFair
- 2 Shelf Bookshelf $90 Get it From Amazon
- Handles for Dressers $30 Also Available on Amazon
- Plywood for my platforms $50
- Paint/Primer/Caulk $100… The Paint I used was “Dover White” from Sherman Williams
- Baseboards $120
- Random Tools/Screws I did not have $50+
Now if you are looking for some helpful tips I am sharing the details below.
DOs for Your DIY Closet
- Set expectations with your wife/husband/significant other that this project might take months to complete (Unless you have dedicated time to work on this)
- Plan out your space and draw it up on paper. How many shoes will be in there? How many drawers do you need? Make sure you have a spot for long dresses… ect… This is the most important part, so you want to make sure you carefully plan that out.
- Get ready to watch a lot of Youtube Videos to learn a bunch of stuff (Mitre saw cuts for baseboards, How to fix drywall, How to fix up baseboards you screw up, just to name a few)
- Buy tools to help you save time and build things quickly. I have a list of tools used below that I just loved for this project. For example, get some good rollers when you are painting your dressers. You want the paint to look smooth!
- You will screw up a lot, so learn how to fix your mistakes to make the final product look good
- Work with what you already have available to save you time/money. I could have ripped out the right side of the closet or the top hangers but I put that into my design to save me time & money.
- Plan what you need to buy from the lowes/home depot so you are not making multiple trips.
- Take your time and enjoy the process. If you are only worried about the end product and saving money, then you should save yourself the trouble and just pay the extra money to get it professionally done.
- Set a deadline for different milestones of your project so it does not seem so overwhelming.
- Use Lowes/HomeDepot to make any long rip cuts of plywood if you do not have the tools or feel comfortable cutting at home.
- Bonus Tip: Research as many DIY closet hack blog posts to see how they worked on their project. You can really learn something.
DONT’S for Your DIY Closet
- If you are hacking furniture together like dressers/bookshelves, try to use natural wood products. I used some veneer bookshelves and they were a pain to prime/paint and I am still not sure how long it will hold up.
- Don’t forget to measure, measure, and measure again before cutting. It will cost you extra money or time as now you need to run to the store to pick up more material.
- Don’t expect your wall corners to be 90-degree angles. Cutting 45-degree angles or straight lines might not be flush against the wall when you put them there. Don’t worry your trim, caulk, and paint will fix that 🙂
- Don’t always cut your wood to perfection. Rough cuts giving you extra space can save you because you find out your measurement was wrong.
- Don’t just do this for saving money, do this because you enjoy learning and building things.
- Don’t think you need to have everything planned at the beginning except for your initial plan mentioned in DOs #2.. Start and improvise as you go. It is the fun problem-solving part of building projects like this one.
- Don’t paint things with your expensive clothes in the closet 🙂 duh. Sometimes we try to be quick and we might get some paint on them.
- Don’t worry if things are not perfect. Chances are your new closet will look 1000 times better than your old one.
- Don’t expect things to look good halfway through…. It ONLY really starts looking good at the end after the caulking, painting, ect… 🙂
- Don’t worry if it is taking longer than you expected. You are probably going through a lot of challenges and learning new things. So take your time.
I really hope you enjoyed this article and feel free to ask me any questions in the comments.
Here is a list of tools I could not do this project without!
- Power Drill, if you don’t have one! Ryobi is my favorite. Buy on Amazon
- Nail Gun (I Have the RYOBI Battery one, it is amazing!) Buy on Amazon
- Drywall Kit for Mudding/Spackling ect… Buy on Amazon
- Paint Rollers for Dressers. For $18, you cannot beat that Buy on Amazon
- 7 Inch Speed Square to make straight lines for my cuts Buy on Amazon
Disclaimer
I am a participant in the Amazon Services LLC Associates Program, an affiliate advertising program designed to provide a means for sites to earn advertising fees by advertising and linking to Amazon.com.